Saturday, July 3, 2010

Chip Truck Style Fries

To me summer means beaches, waterfalls and lots of chip trucks selling the same product. Most places have similar tasting fries and they're good because they do it right, they know the trick. I made home fries many times in my life and I always just thought it was simple; throw some sliced potato in some hot oil and cook 'em. Well life is never that simple and that's all wrong.


Ingredients:

As many potatoes as you wish (I use Russet)
Oil
Salt

I always leave the skin on my potatoes when I make fries. You don't have to leave the skin on but if you do you should scrub them because they are probably dirty. Apparently they come out of the ground or something. You need to slice them uniformly into french fry shape. They are pretty sweet when cut thick, and I'm not even a thick french fry kind of girl. I like 'em shoestring... but not these puppies, these are different. Don't forget to soak your spuds in icey cold water for a few minutes. There's a reason for this and I believe Bill Nye would know it.

To fry them I use vegetable oil but you can use whatever you normally fry food with. Enough to cover them, common sens-ical nonsense. Heat it up to 325 F and put your potatoes in.
Just in case you weren't sure what boiling oil looked like

This is where the trick comes in to play (most people already know it, just let me think i'm revealing a giant secret please?). Cook your potatoes at this (325 F) temp for about 10 mins or until they are fork-tender. Take them out and put them in a paper towel lined bowl. If you're doing batches because you're super hungry or have friends or something then lather, rinse, repeat.

This is fork TENDAAA.

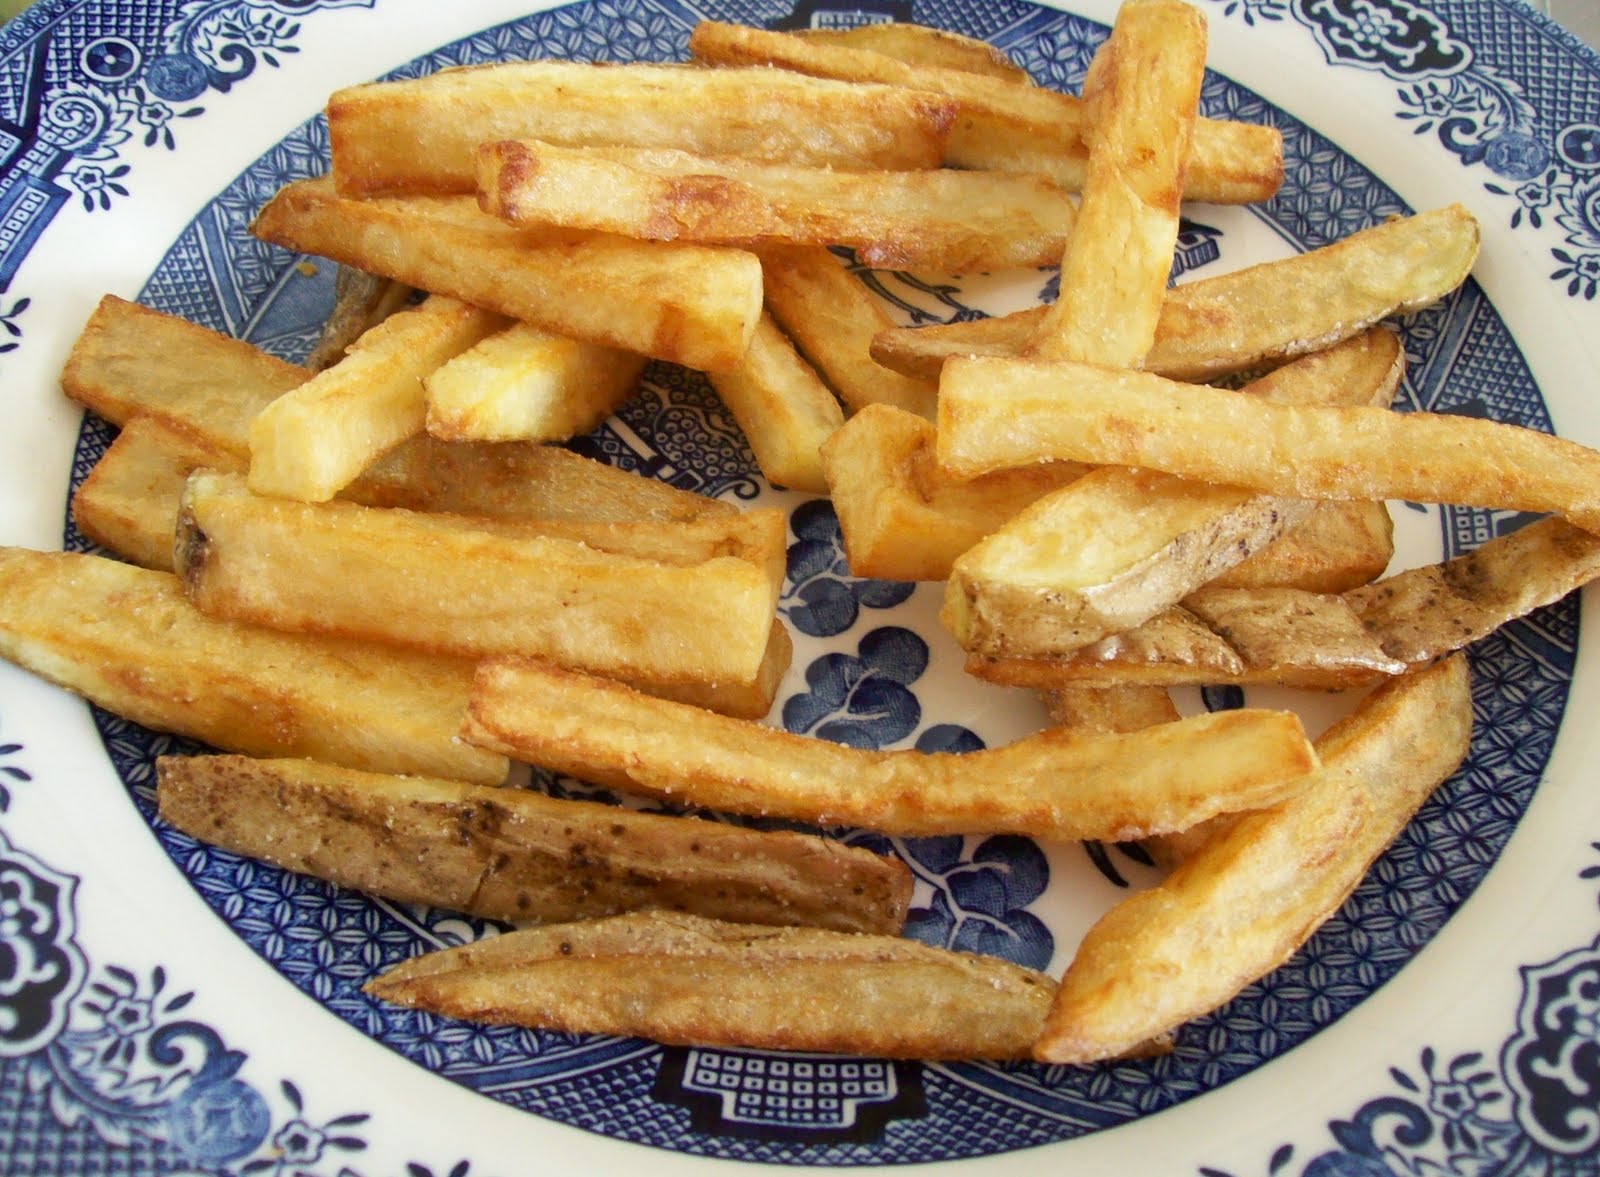
**Up your oil's temp to 375 F and put your previously cooked fries in the oil to brown up. They're already cooked inside so just brown them to your liking, paper towel them, salt 'em and you're good to go. It's no real science but I like to pretend it is.


They're seriously perfection and no picture could ever capture it well enough. Also, because I say so they have like 5 calories and 1.5 grams of fat per giant plate. CRAZY RIGHT?

Sunday, June 27, 2010

Strawberry Shortcake

Strawberry season is the best season of all and it is upon us. For the past few months imports from California have been hitting up my yogurt and cereal... nothing to write home about, let me tell you. Finally, the local strawberries are in the grocery stores and they are little things of beauty. I may have cheated a wee bit on this first post. The biscuit is one I use a lot from a scribbler my mother has had for years and I made the rest using recipes from my Baking Illustrated cookbook.

Biscuits:


1 Cup Margarine (I would use butter here, but this is the old lady's recipe and she thinks that is gross)
1/2 Cup granulated sugar
2 Eggs (lightly beaten)
4 Cups All Purpose Flour
8 tps Baking Powder
1 tsp Salt
3/4 Cup Milk

Preheat your oven to 450 F.

Mix all your dry ingredients together and cut in margarine (let's pretend it's butter though because that's the way nature intended) until it resembles corn meal. Here is where I would add my eggs to my milk and beat them a bit and then gradually add it in to the mix. You can do it however you want though, maybe I just think it looks prettier that way.

Divide your dough in to two so it is easier to work with and flour your surface. Pat dough out (no need for heavy rolling pins, people) and use a floured cookie cutter so you don't have to worry about your dough sticking to it.

NOW! If your biscuits are thicker bake them at 450 F for 15 minutes. If you're into the thin, about 12 minutes at the same temp.


Strawberries:


8 Cups Strawberries (2 1/2 pounds) hulled and sliced (you will notice that there are far less berries in the pictures, you're smart!)
6 tbsp granulated sugar

Put 3 cups of your berries into a bowl and mash them with a potato masher. Great for releasing the day's stresses. You can yell things while you're doing it if you wish. I'm not going to give you ideas but if it's needed it will come naturally. Add the rest of your berries to the ones you just beat the crap out of, add your sugar and mix it all together. Let the berries sit for a while (around 30 minutes or until you can no longer handle it anymore and must consume them).


Whipped Cream!!!:


Put your mixing bowl and beater/whisker-majigger attachment in the freezer. Be careful when you take it out though because it gets really cold and isn't pleasant on the hand.

1 Cup Heavy Cream
1 tbsp Sugar
1 tsp Vanilla extract

Add all ingredients to your bowl and beat on low speed for 30 seconds or so. Switch to medium speed and continue the beating until it starts to thicken and leaves that trail thing they're always talking about on the tv. Give 'er to high speed and beat until you reach those peaks you're looking for (soft or hard, that's your prerogative.)

Or seriously, just squeeze the stuff out of the can into a bowl and say voila!

Assembly:

Take your biscuit and put some berries on it, then put some whipped cream on top of that then put the top of the biscuit on and a bit more of the berries and some whipped cream.

Biscuit in a bowl!


Berries, on a biscuit in a bowl!


Hello, hello, hello ... aloha.


Saturday, June 26, 2010

Let's get this started!

When I cook I pretty much always use recipes from food blogs. I find they are way more detailed than cookbooks (aside from Pioneer Woman Cooks which is essentially her awesome blog in book form) and have notes from the blogger and what have you. I really find I get better results from these recipes. What I intend on doing with this blog is documenting my experiences with these recipes along with whatever else I whip up. I just completed my first university degree and at the moment I am living with my parents. At times I will be cooking for a picky 50 year old, they're so cute at that age (it's just a phase...), and will alter some recipes to reflect this.

So yeah, that is that.